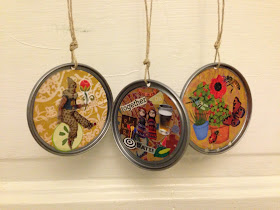
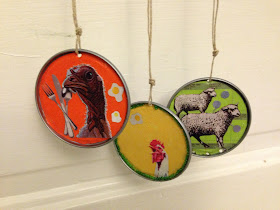
 About a month or so ago, my friend SSAF had an epiphany regarding my backyard cherry tree and how to keep the birds away. This is how craft projects happen, isn't it? One day, you look at some thing - like the lid from a frozen orange juice container - and you realize that it shouldn't go in the trash but that it needs to have a new life as a bird deterrent on a fruit tree.
I use wind chimes in my tree but I love this idea. The lids are not super-shiny but they're "metal" enough to reflect some light and they're so easy to make that you can have tons of them decorating anything you want to keep the birds away from.
So, SSAF started saving juice can lids and she also started obsessively cutting out little paper things to decorate them with. She claims this is theraputic... All I can see is shoulder pain and strained eyes. :) Thank goodness she enjoyed this part because we had SO much fun stuff to work with when we sat down to craft last weekend. Take a look at the itty-bitty bits we got to play with!!
 |
| Kitschy and cute. |
 |
| SSAF knows I love ephemera. |
Step one is to make a hole in the lid to run your hanger through. We used a hammer, screwdriver, and a block of wood. This did leave a bit of a sharp piece on the back that I mashed down with some pliers. If you have a metal punch, that would work well too. You may also punch some holes in the bottom so you can hang things (bells, beads, whatever) from the bottom of the piece.
Step two is to pick your decorations and do a "dry" layout. Once you're happy with how it's going to look, you move to...
Step three - Mod Podge!
If you've never used this wonder stuff, get thee to a craft store. Made by Plaid, Mod Podge is an adhesive and a sealant and dries wonderfully clear and a little bit shiny. I hadn't worked with it in years and had forgotten how glorious it is.
 |
| Awesome stuff. |
 |
| Paint some on the lid as glue |
 |
| Place your pictures & cover with a good coat of Mod Podge |
Then just hang them up or lay them flat to dry. C'est tout! The Mod Podge dries very clear as you can see from the pictures below. I can't wait for spring to sprung so I can hang these beauties on my tree!
The cutting of the fun paper bits was probably the most time-consuming part of this project. Of course, I was the delighted recipient of SSAF's efforts. You certainly don't have to have to make collages - you could cover them with nice wrapping paper or individual images cut from magazines. The beauty is, these can be as simple or as complicated as you want to make them.
I'll let you know how well they work after I put them on the tree this year!
- Alex


If you're feeling like a cheapskate or just ubër crafty, here's a homemade recipe for Mod Podge: http://www.instructables.com/id/Create-Cheap-homemade-Modge-Podge/
ReplyDelete