Pages

Breaking Out The Vintage MD

Cassandra is off being inspired at the HOW Conference in San Francisco this week so we invite you to enjoy a post from last fall on how to make your own hand lotion bars. (Alex admits to selfishly choosing this post because the recipe employs beeswax.)

===========================================================

Originally published on October 29, 2012


Making Your Own Hand Lotion Bars

Guess what I did? I made my own solid hand lotion. It was something that I've wanted to try for a while (and actually had the supplies sitting there waiting) but I kept putting off. I thought it was somehow going to be complicated or take forever.

Au contraire mon frere. It was simple and quick. (I think start to finish was under 30 minutes.) And the results yielded the best hand lotion I have ever used. It was even superior to similar natural ones I purchased.

Pretty little pots of awesome.

There are many, many tutorials out there and I'm pretty sure I looked at most of them in my research. In the end, the recipe I decided to try was this:

4 oz shea butter
4 oz beeswax (I used pellets)
4 oz avocado oil
essential oils for scent (I used a lovely blend from Lucky Mojo)

To get started, you need a double-boiler setup. You can purchase a proper double-boiler but I used a metal mixing bowl over one of my saucepans and it worked great. You just have to make sure you have the proper heat-resistant tools to lift the bowl off the saucepan easily when you need to take your concoction off the heat. Practice taking the bowl on and off the pan steadily before you heat anything up. The last thing you want to do is spill the hot lotion. It will result in a trip to the emergency room for burn treatment or a kitchen counter that will forever seem waxy and smell like rose geranium.

Another thing I need to mention is that once you heat up this concoction in a pan, bowl, or whatever...it is now contaminated. Don't use it for food anymore. My metal mixing bowl is now marked "lotion only".

The next thing you need are containers to pour your hot lotion mixture into. If you have soap molds you can make lotion bars. Once cooled, you just pop out the lotion bar and rub it on your hands like you would a bar of soap. These are so fun and if you can find a cute container to fit them would make great holiday presents. I chose to use 4oz glass canning jars. I have to sort of "scrape" the lotion out of them...but it's not big deal. I sort of have a thing for little glass jars with something gorgeous inside. It's my hang-up, most people would probably prefer a bar. Whatever you use should be heat-resistant though.

Now get started....

On a counter a few feet away from your stove, put down some newspaper and lay out your jars, molds, etc. ready to be filled with the hot lotion. (I used about 6 jars for the recipe above.)

Then, get water simmering in a pan. Make sure that when you put your second pan or bowl atop the pan with water that the water is not high enough to touch the bowl/pan above. Here is a great tutorial on double-boilers.

In your top bowl/pan, put the shea butter and the beeswax. Once the water is simmering, put this bowl/pan on the simmering water pan and stir constantly. Because you won't ever want to use this utensil again for food, I found that a disposable wooden chopstick worked awesome for stirring.

You will only stir for a few minutes before this mixture is completely liquified. Once this happens, pour in the avocado oil and keep stirring. As soon as it looks mixed and right, take this off the heat and pour into your molds/jars. You do not want to overheat the mixture or your ingredients can start getting weird on you. But don't worry, it's obvious when it's time to get off the heat. The oils will be completely liquid and a light golden color. 

Now is when it's handy to have a friend helping you. This mixture begins to cool quickly, so as one of the molds/jars gets poured, someone needs to follow behind and add the scent oils in and stir in well (but fast) with a toothpick. You don't want to heat essential oils so they get added at the last. As far as how much essential oil to add is up to your preference. I was generous with mine and have no regrets.

I let my lotion cool for about 10 hours before I deemed it ready for use.

Some recipes call for alternate ingredients like coco butter or jojoba oil, but this recipe felt right to me. What I might add next time is some vitamin E. (You can buy it as oil or just squeeze the contents of capsules right in with your essential oils.) This is supposed to act as a preservative from what I understand. You can order all the materials you need online or if you are as fortunate as me, buy them at a local natural pharmacy.

Sorry there are not more photos here but I was making these on my own and needed both hands. :)  But please take my word for it, these are simple and fun to make. This is the best lotion for crafters whose hands take a lot of abuse.

- Cassandra

Home, Home At Last (Part One)

Today, I begin the tale of an epic journey taken by a colony of bees - from the wilds of Middleton, WI to the urban jungle of Madison - a long, arduous trip of ten whole miles.

On a sunny, Sunday afternoon, I headed to the west side of town, past the little airport and into an area that is somwhere between suburban and slightly rural. There are lots of spots like that around here - farmland that was sold off to developers and turned into communities with names like Golden Prairie Estates. The land still has a country feel to it but the horizon is filled with houses that all look vaguely similar and every yard is cluttered with Fisher Price toys.

The veteran beekeeper who so graciously agreed to sell me some of her bees lives in one of the older communities in this area. Not converted farmland but a long, winding street where every unique house is on about an acre of land. Her lot, in particular, was extremely impressive - with a massive garden, well-chosen trees and plantings, a pond with a duck, a few chickens, and (of course) beehives. The place felt a little bit like paradise and, as much as I wanted to, I felt like it was an intrusion to ask to take pictures.

Most swarms head into a tree.
There are two ways to buy bees - by the pound, in a shoebox sized screen box with a queen in her own, seperate queen box, or already established frames of bees. I was getting the already established kind. Here's how this happens: when a beehive gets "full" of bees, the bees will naturally split themselves into two groups. The queen will leave the hive, taking about 1/2 the workers and the drones with her. This is called a swarm.

The bees that remain, create a new queen and continue on. However, a conscientious beekeeper can intentionally split their hive before the hive swarms on it's own, creating what's called a "nucleus" or "nuc" for short. The beekeeper will then sell the nuc to late-comers like myself. It's a great way for the hobby to pay for itself.

The nuc comes in a "nuc box", which is just temporary housing until you get them into their hive. I called it the condo. My supplier uses cardboard nuc boxes that each hold five, established frames of comb. I was given four frames of "brood comb", which is where the queen lays eggs and the workers feed the babies, and one frame of honey comb so the bees had something to eat.

The bee condo (aka: nuc box)
My new mentor (we became fast friends, bonding over bees, knitting, quilting, and upholstery!) taped the top of the box down and I loaded them into the back of the car. After fumbling around with some twine in an effort to secure the box so it wouldn't bounce around on the way home, I bid goodbye to my new friend and headed home.

I had already prepped the area where the bees would live - in the space that used to be occupied by the rain barrel - so it was just a matter of carrying the box to the spot, setting it down, and opening up their entrance hole.

My dogs were fascinated. I think they could smell the honey and the sound was driving them nuts. The first casualty was my dog Caesar who, in his intense curiousity, ended up stepping on a bee and getting stung on the foot. It gave him the perfect opportunity to limp around acting like it was the end of the world for the remainder of the day.

Caesar was the first casualty.

Lilly was less impressed but felt the need to get involved.

Air vent for the condo
The condo was great - sturdy and perfect for transporting the frames I was given. But, as we all know, cardboard doesn't hold up to rain and we had a couple of doozy thunderstorms over the week that they were in it. After the first rain I realized that I had to cover the condo somehow so I bought a tarp and some twine and went home to fashion an awning over their area. I didn't take any pictures of the finished product because, frankly, it looked like a crazy person's tent but at least it did the trick! (Just to give you a visual, It was staked with a variety of implements including three of those tall, curly tomato stakes, a black plastic fencing stake, and a random assortment of tiki torches.) During the worst thunderstorms, the condo stayed dry and the bees stayed safe. Thank goodness!

In part two of Home, Home At Last, we'll look at the move from the condo to the permenant home - a beautiful western red cedar hive from Legacy Apiaries in Indiana.

- Alex

Friday Finds: Stitch Mapping

I'm not sure if I've ever expressed my dislike for knitting charts but I'll confess it now. Considering that I'm a pretty visual person, it's counter-intuitive that I would find charts so confusing but, I do. Cassandra has knit from charts and (I think) likes them well enough. All I see is a jumble of confusing symbols.

The other day, Cassandra discovered Stitch Maps.

A new kind of charting, Stitch Maps show you the chart in the "shape" that the final object will take. They describe it like this:

knitting charts drawn without grids so you can see how the fabric flows

Here's an example from their site:

Here's what Feather & Fan looks like knit up
Here's a classic chart for Feather & Fan
Here's a Stitch Map for Feather & Fan

So, it's different and, for whatever reason, it makes more sense to my eyes. Anyone can submit patterns to be "stitch mapped" (written patterns are made into these new charts). If you want access to the Stitch Map library, you must subscribe. There's a basic subscription for personal, non-commerical use and a "pro" subscription for knitwear designers.

Check it out! You may start seeing Stitch Maps associated with our patterns!

- Alex

Strawberry Jam

Saturday morning I woke up and did something I've been doing for about two weeks straight. I called our favorite local farm to see if the strawberries were ready to pick. My hopes were not high as I've been hearing "in a few weeks" on the message for a while now. Much to my surprise, on Saturday morning the message said they were ready!


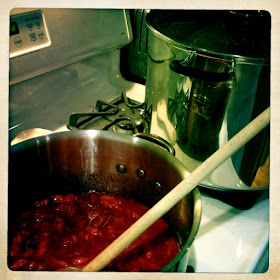
The six of us piled into cars and took a short trip to the strawberry patch. Being the first day of ripening, the picking was not easy. You couldn't stay in one spot very long as the red berries were scattered here and there throughout the rows. (The littlest of our party running from one to the others of us...eating more than picking.) But after an hour and a half we were done and had 32 lbs of strawberries to show for it. Yes, I said 32 lbs.


I call this one: Berries on Formica

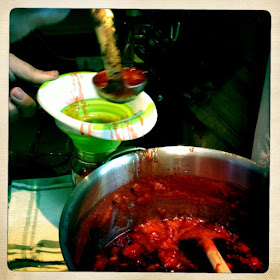
Our intention for picking so many was to make jam and use our new bath canner put the jars up properly. Little did we know that 3 days, and over 40 jars later...we would finally finish processing all those strawberries! We over-picked and paid the canning piper...but we will be enjoying that mistake all year long! Wow, this home-made jam is sooo yummy.


We tried a few recipes and every one of them ended up being a winner. We made strawberry-orange, strawberry-blueberry, strawberry-vanilla, plain strawberry, low-sugar strawberry, and low-sugar strawberry-blueberry. I used the low sugar recipe from The Homemade Pantry cookbook, it is spectacular. Those were just as tasty as the regular ones and I didn't miss the sugar a bit.


The bath canning process is time-consuming and frankly made me a wee bit nervous. All of the directions that I read on the subject put the fear of God in me about botulism. I'm sure we did everything okay, but there is talk of purchasing a pressure-cooker to add to our canning arsenal. Those bad mama-jammas don't play with germs.

Even though we may have overdid it with 32 lbs of strawberries, we are not turned off by making jam in the future....raspberry season we will be ready for you!

–Cassandra

PS-I know I promised some quilt close-ups today...but strawberries wait for no one!

Converting The Masses

"He who can, does. He who cannot, teaches."
  - George Bernard Shaw, Maxims for Revolutionists: Education. Man and Superman, 1903

This quote is taken out of context a lot and used, regularly, to imply that teachers are somehow lesser beings for being teachers instead of doers. Setting aside the current state of our education system and the fact that teachers are regularly treated as second-class citizens (even though they're tasked with educating the next generation of people who will contribute to our society), I open today's post with this quote because I want to proudly claim "teaching" as a new-found skill.

I believe I mentioned that I was teaching a couple of knitting classes here in Madison, in support of the release of What (else) Would Madame Defarge Knit?. The first was a week and a half ago - a beginner knitting class of 17 people, most of whom had never touched needles or yarn. Thankfully, Cassandra was there to help because trying to provide one-on-one instruction to brand-new knitters proved intense. I believe it was successful as I know that at least two of the people have stuck with it and now consider themselves knitters. :)


The reason I mention this today is because one of my "students" from the first class was my friend, Kristine. She's also one of the people who not only stuck with it but jumped in with both feet. Within a week of the class, she'd gone out and bought some KnitPicks Harmony needles (because she loves beautiful things) and some new yarn. She started using YouTube, as I advised, to help her when she'd get lost or forget how to do something. And, she called me when it was time to cast-off.


She had tried casting off on her own but - as we all do in the beginning - had gotten discombobulated. So, she came over last night and we had a little impromptu class in my living room, where (I'm proud to say) she successfully cast-off her first dishcloth. We also covered "unknitting" and how to change/add yarn in the middle of a project.


The most satisfying thing was seeing her work. She'd obviously practiced and her finished object showed it. Her tension was great and she had nary a dropped or twisted stitch. I'd like to take a small amount of credit for that although it probably has more to do with the fact that she's a bit of a perfectionist. LOL  Either way, I'm bursting with pride at her accomplishment and my small role in it.

My next class is on June 23. It will be an intermediate class or, probably more accurately, an advanced-beginner class. I am, surprisingly, really looking forward to it. I'm amazed at how much I enjoy teaching knitting and watching people "get it".

I guess we can consider it my contribution to Knitting World Domination. ;)

- Alex (taking over the world, one stitch at a time)

PS - While most don't know it, I have an unreasonable dislike of variegated yarn.  There's no explanation for it other than it tends to fall into the "whimsical" category in my brain and I really hate whimsy. (Cassandra and I bond over our dislike of variegated yarn.) I would like to show the world that I'm trying to get over my ridiculous judgement of this category of yarn... I found this cotton (Sugar & Cream) in a melange of colors that really appealed to me. Unfortunately, I'm not thrilled with what it looks like knit up but I'll muck around with it for a while and see if there isn't anything I can make that I'll actually like. Who knows... maybe I'll be a convert.

The Man in the Wilderness Quilt Pt. 1

In the spring of 2012 I had this crazy idea. Driving through the country on my way home from work, through a misty rain I saw the brown and ochre landscape slowly giving way to the new bright green buds of the season. It was breathtaking. I knew I wanted to capture this color impression in a quilt.


 And then, on top of that idea, I had been listening to the Natalie Merchant album, Leave Your Sleep. On one of the tracks, Natalie puts music to the Mother Goose poem, The Man in the Wilderness. I loved that poem as a child and Natalie does it more than justice with her musical arrangement. Those colors and that poem were a match made in heaven for me. So I began my design.


Putting my graphic design skills to work, I laid out an arrangement of different sized blocks to fit within the constraints of the queen sized quilt I wanted to make (76" x 90"). I had no idea what was going to go inside those different blocks so I had to research beginner type quilt blocks that would fit in each space. I also specified six big patches to use for embroidery/applique of the poem.

This is the quilt's baby picture.

Now this quilt idea was crazy mostly because I had never really made a quilt and this quilt was going to be so big and include so many different kinds of blocks. As I learned, I thought I would share my knowledge with you as my scrappy log cabin, pinwheel, staggered strips, applique, and propeller quilt block tutorials. I'm so happy about the popularity of these tutorials because my intention was to help beginners like myself tackle some basic quilt blocks with as few tears as possible.


I took my time (obviously by the finish date on this project) and really tried to do things right as I went along. There were some frustrations and self-doubt but surprisingly few regrets. I loved the process and have already started my next project.

I did make the choice to have my quilt professionally quilted by our good friend Stitchlilly. Best. Decision. Ever. I chose an overall stipple pattern except for the applique areas. Those I did by hand with 6 strands of embroidery floss and no set-in-stone pattern. I wanted it to be a little more free-form and playful.


My next post will highlight some of the small details of this quilt an hopefully some better photos. New discovery of mine: photographing something so large is not easy!

–Cassandra

PS-I will admit, for a moment, as I was sewing up the colorful scrappy blocks...there was some small panic. Was this going to be too colorful? Obnoxious even? But I pressed on with fingers crossed. Did it turn out to be too much? Hells yes. But I love it anyway!

Friday Finds: Get Away From It All.

Have you ever considered what it would be like to disappear for a few days with like-minded, crafty friends and just do your thing?

Our dear friend, Stitchlilly (quilter extraordinaire), is a big fan of crafting retreats and organizes a number of them throughout the year. Sometimes they're themed - quilting, knitting, etc. Sometimes they're just a bunch of crafters getting together to sit and make unimpeded progress on a project. As a matter of fact, due to a work committment, I'm missing one of those weekend-at-the-lake craft retreats right now. Sigh.

Not the actual cabin but I'd love to be sitting here and knitting...

You can plan these yourself - you just need a destination and a few friends to share the cost - or you can attend one of the larger, super-organized retreats that have become popular. Here are a couple of the bigger ones that Cassandra and I always lust after:

Squam

Retreats, workshops, and lots of inspiration. The next in their series is in September and is in conjunction with Taproot Magazine. More than crafting, Squam is about discovering the artist inside us all and connecting with like-minded friends and mentors.

Makearoo

"What lights you up? Who are you meant to be? Let's find out together." This is the challenge that greats you at Makearoo's website. Offering retreats, workshops, and mentoring, Makearoo has a real hands-on attitude (and a great sense of humor) about personal enrichment. Check out the blog!

Don't stop here though. If your thing is scrapbooking, you can spend an entire weekend with nothing but scrapbookers. Same for knitters, embroiderers, quilters, etc. etc. etc. Google search your favorite and start taking vacations that feed your soul. :)

- Alex

The New Knitting Book is Here!!

Do you remember this:


Well, that's how I felt the other day when a copy of What (Else) Would Madame DeFarge Knit was in my mailbox. Watch out world...Alex and I are in print!

The pattern we designed was a layette set inspired by the book Rosemary's Baby. Here is a snippet of the introduction to our pattern:

This fancy layette, fit for the newborn Son of Satan, includes a sweater, bonnet, and little mitts designed to keep him from scratching people with his tiny devil claws. Lacy edges, a touch of eyelet, and some silk ribbon will make any baby look like a prince [or princess.]

Our layette on a really cute baby!

We are so proud to have our pattern included alongside of so many other wonderful patterns. What an opportunity this has been for us. Here are a few of my favorites:


You can view beautiful color photos of ALL the patterns included in What (Else) Would Madame DeFarge Knit here. There are designer-led "knit-alongs" going all the time. Keep tabs on what's happening when at the WWMDFK? Facebook page. And, of course, if you're a Raveler (which I'm sure all our knitting friends are!), you can see pics of some of the patterns and more at the WWMDFK? Ravelry page.

As a designer for this book, you are also required to write an essay about the fictional character that inspired your knitting. I just got my copy a couple days ago and I've torn through all of them already. I love each one for it's honesty and cleverness. I think you will too.

The book can be purchased through the publisher's site, Amazon and Barnes & Noble.

–Cassandra

I'm a Little Buzzed...

Oh lord... get your mind out of the gutter, people! I'm talking about bees again. Seriously, do I talk about much else these days?

Hard at work! (Bee trivia - all worker bees are female!)

Everybody do the bee dance! I got word last night (Sunday) that my bees are nearly ready to come home. The estimate is about nine more days - which is perfect because I'm still waiting for my equipment to show up!!

The woman supplying me my bees has offered to keep them and do some evaluation on the brood frames - these are the wooden frames that the bees build their comb on. She's also kindly said that I could come over and get a lesson on what to look for. I have to say this... as hobbies go, beekeepers are such a generous group of folks! Everyone has been super-helpful and really gone out of their way to ensure that I'm fully informed. Hmmmm... now that I think of it, maybe they're just trying to make sure I don't kill myself (or give beekeepers a bad name!) LOL

Anyway, all the basic stuff I need is ordered. I considered trying to save some money and buy stuff from Craig's List and eBay but, frankly, the convenience of being able to order everything from one place won out.

Here are some of the things I had to buy:

A hat and veil - so bees don't sting my face (this is kind of important)

I'm too sexy for my veil. Too sexy for my veil. So sexy I won't fail...

Gloves - so bees don't sting my hands while I'm poking around in their home.
I defy any bee to sting through that leather.


Tools - because... well... all beekeepers should have hobby-appropriate tools. My favorite tool, by far, is the smoker. There's something weirdly romantic about being able to calm the bees with a bit of smoke.


Just like in the movies! I'm going to smoke bees!

Yeah... it doesn't look like much but it's indispensable.

This is a thing. Not sure I really needed it but it was cheap.

Not sure I couldn't have just bought a brush at the dollar store but...

And, of course, the big-daddy of beekeeping purchases - the hive itself.

So gorgeous!

After much debate and emotional roller-coastering, I decided to go with a standard Langstroth hive. Well, not exactly standard - I'm using the smaller (less popular) model - but standard in that this is the style of hive most people use. In the end, I decided that adding a layer of complexity to my beekeeping was not how I wanted to start out my hobby. And, to be perfectly honest, I met an amazing woman who's been keeping bees for five years and she teaches beekeeping classes. She took all my concerns about Langstroth hives and all my reasons for thinking about other hive types and gave me answers and solutions to remove my worries. So, Langstroth it is. Maybe someday I'll experiment with some alternative hive options and see if I like them better. :)

I'm stoked about the hive I bought. It's made from red cedar (sustainably harvested, of course!) and looks gorgeous. The guys who run Legacy Apiaries seem like really fine people and I'm looking forward to a beautiful, long lasting hive in my yard.

So, stay tuned. I'll try to take some pics when I go meet my babies and, of course, when I bring them home and install them, I'll be sure to give you all a complete update. And, don't worry... I'll get distracted by something else again soon so it really won't be all-bees-all-the-time forever. :)

- Bzzzzzzzzzz Alex