Little Projects

I am so excited for this weekend...it's finally Craft-a-Palooza time again! Normally this 2-day sewing marathon is just my cousin Sandy and me hammering out small sewing projects with gusto. But this weekend our Grandma is joining the party. Yeah! I'm sure this veteran crafty rock star will have a lot of knowledge to share with us kids.

Craft-a-Palooza weekends are an instant gratification free-for-all. No big projects allowed. We want to start and finish something fun in two days...and, hopefully, make lots and lots of whatever that fun thing is (in between chasing children and snacking).

Normally, my cousin and I exchange emails containing project ideas for the weekend. Unfortunately the the summer has been so busy, we haven't followed our normal protocol. But, I've been poking around on the interwebs and I have a few ideas to get us started.

Handy Items (who doesn't need this stuff):

The Square Deal Pincushion by Heather Bailey

A really cute pincushion that we could make assembly-line style. I'm thinking Holiday gifts for everyone!


Box Pouch Tutorial by Make It Modern

A while ago we made zippered bags, this boxy one goes one step further.


Emmeline Apron by Sew Liberated

I have been aching to make a cute apron for quite some time now.


Back-to-School 

Travel Messenger Bag by Susanne Woods

Kid's Messenger Bag by Zaaberry

Maybe messenger bags for the kids? Sandy's are a bit older than mine so we might have to use 2 different patterns.


Just Plain Selfish Me

Art Smock by Oliver & S
I might have to barter some older-boy pajama bottom sewing for some help knocking out an art smock for my kindergartener.

Speaking of Pajamas...

Making pajamas is an awesome way to spend a weekend. Even the bigger boys (and daddy's too) love having fun pajama bottoms. I recently bought this pattern for my littles and I have a stack of fabric just waiting to be sewn into night-time cuteness:

Bedtime Story Pajamas by Oliver & S

Who knows? Maybe none of these projects will make it on the roster next week after Grandma gets some ideas flowing or Sandy has a eureka when trolling Pinterest this week. No matter what we make, we will have a blast. I will be sure to share the hand-made bounty with you next week!

–Cassandra

Friday Finds: Another Time Suck

The one thing we're suckers for, here at Mighty Distractible, is gorgeous design. It doesn't matter what it is - a toilet paper holder or a house or a billboard - if it's designed well, we celebrate it.

Now you can celebrate design, and get lost in a deep, deep well of content, at designboom.com.

One of my favorite things about this site is their tagline: "since 1999 home of design culture, leading independent publication for design, architecture, art, photography and graphics"

I found the site through Pinterest (of course) when I saw this:

'sand bowl' by leetal rivlin

My first impression of the site was that it was overwhelmingly advertising heavy and that there's WAY too much copy crammed into the home page. Funny that a site dedicated to art and design would have such a crappy design but...

Once I got into it, I fell in love with the inspiration. A lot of the content is submitted through their DIY Submissions feature. If you type DIY into their search engine, you'll get TONS of cool ideas for projects.

So...you can curse me and thank me later. ;)

- Alex (the pusher)

Blogging 101

The blogging community is huge, isn't it? And more than a little intimidating. It's easy to feel like your blog is this remote island waiting to be discovered by curious travelers. Preferably travelers that are into the same stuff you are. Don't get discouraged...we have some tips on how to make this happen.


In the world of Mighty Distractible, there are 2 kinds of folks: "our people" and "not really our people". It's our super-simplified way of using marketing strategies (courtesy of our day job at Company X) to be able to identify the demographic groups that will be most likely to enjoy our content. For instance, knitters are "our people" but deep-sea divers...maybe not. That's not to say that the deep-sea divers wouldn't find us charming and fun but, let's face it, we talk a lot about crafting so, really, they might get bored.

Once you understand who you should be talking to - your most likely demographic - the trick is getting the attention of those people. One of the best ways is to share your content with other websites with similar content so that you're exposed to a larger audience. This can take the form of guest blogging or cross-posting sharable content such as patterns or recipes.

Luckily for us crafters, there are many web sites devoted to coordinating and publishing good content from multiple sources. We have gained lots of readers by submitting free patterns or tutorials to sites such as these.

Here are a few places that Mighty Distractible can be seen online:

Our Fluffy Puffs Hat at All Free Knitting


Easy Log Cabin Quilt Block Tutorial at FaveQuilts


Embroidery School Lesson 3 at Craft Gossip


Free content on a subject-specific site gets "your people" over to your blog. If they like what they see, they will poke around for a while...and if they really like what they see, they will come back again and again. Now, please be aware, this is just one way we are getting the attention of online crafty readers. We also try to keep active in the greater crafting community including doing pattern submissions for books as well as some upcoming guest blogging. Oh yes people, building a blog audience takes work!

Alex and I are so fortunate to be crafty bloggers. The online crafting community may be large, but the people who make up that community are so generous. It is really true. The volume of free tutorials and patterns online is staggering. This is a group who loves to share ideas and give encouragement to all who want to have a try at creating something all their own. "Our people" are pretty awesome!

–Cassandra

Friday Finds: Inspiration

Cassandra and I are always looking for inspiration - especially now that we're designing patterns - and I, personally, love learning new knitting techniques and stitch patterns. Put that all together and you've got...

New Stitch A Day!
knitting and crochet made simple.

This addictive site, founded by the charming Johnny Vasquez, is chock full of fantastic video tutorials, articles, and patterns. The video tutorials are very easy to follow and there are enough interesting knit/crochet patterns to keep me busy for a loooooong time. Plus, once a week Johnny does "This Week In Stitches" which contains all kinds of useful content and a video communication from Johnny about what's going on at New Stitch A Day. FUN!

Sign up for the email alerts and you'll get a new stitch pattern every day delivered right to your inbox (or you can get a once-a-week recap). ;)

I hope you find as much inspiration in it as I do!

- Alex

Staggered Strips Quilt Block

Hello crafty friends,

Today I have another quilt block tutorial to share with you. I'm calling it the Staggered Strips Block. The effect is a stack of different bright patterns framed by a common background. For my blocks' background I chose a tree bark pattern, but you can definitely use a solid with fun results. This tutorial illustrates how to make a 6x10 block. However, because of the simple construction, you can alter these directions to make blocks of any size.


I tested quite a few ways to construct this block before I found the simplest steps to get the random design I desired. For those of you who tend to be more uptight about pre-planning your blocks with exact measurements, this process might be a little uncomfortable. But, try it anyway. The outcome is worth it. And, sometimes, it's good to get out of our comfort zone. Plus, this is a great remnant buster - get rid of those little bits of fabric that you have left over from ancient projects!

Here are the directions for making one block:

Begin by cutting your background fabric (A) into 1.5" strips and 2.5" strips.

Trim the 1.5" strips into eight various lengths from 2" to 4". (For best results try to get some really random lengths in there like 3.25" or 2.75".) Set those aside. Do the same for the 2.5" strips but you only need six lengths of that one.

Take your bright pattern fabrics (B) (great place to use random scraps if you are looking for something funky) and cut them into 1.5" strips and then trim four pieces random lengths from there in the same manner you did with the background strips.  Repeat the process making three 2.5" wide strips.

At this point, organize your 1.5" and 2.5" strips into piles. Take your pile of 1.5 strips to your sewing machine. Choose a colorful pattern (B) strip and grab 2 lengths of background (A) fabric that will go on either side of it.

The idea is to come decently close to the 6.5" horizontal measurement that you will need in the end, but an inch or two on either side that will need to be trimmed on your strip is all part of the process. You might want to choose a long background strip for one side and a short one for the other mixed in with strips that are more evenly distributed. You want your center row of bright blocks to playfully stagger up the middle.

An example of how you would choose the proper lengths. To make a finished strip that is close to the measurement you want.
With a 1/4" seam allowance, sew the two A fabrics on either side of the B fabric.

You can definitely use the faster chain piecing technique when sewing a bunch of these strips together. How I would recommend doing that is to get your pieces all matched the way you would like them and then make them into stacks in the correct order so you will ensure that your strip in the end will be long enough or, on the flip side, not too long.

Repeat the process for the 2.5" strips. Press the seams to the side of the darker fabric.

Now you have the strips you need to construct your block. Each block is made up of four 1.5" strips and three 2.5" strips. (On my quilt I wanted the order of these to be random so each block is different, but you could do it more orderly if you'd like.) Take your strips and lay them out in the order you think they look best.


Please Note:
  • Keep in mind that the design should look like a wonky stack of colored blocks up through the middle. 
  • Take special care when pinning your two strips to sew together that you match up the fabrics where you want them. You are most likely sewing together two strips that are different lengths.
  • Make sure you have a clear vision of the desired width of your block when putting your layout together. You want to make sure that you leave yourself enough background fabric on the sides to be able to seam to the block next to it on your quilt and leave enough of that background fabric so that it doesn't look strange.
Stitch your strips together with a 1/4" seam allowance.

Press your seams to one direction. Like this:

Wrong side of finished block. You can see the seams are all going upward.
Now it's time to trim your block down to size. Use your rotary cutter to trim down the sides of the block to the 6.5". Make sure you have a good idea where both sides should get trimmed for best balance before you cut. This will help to ensure your finished block looks like you imagined.

Mine is wonky and woodsy!
Good luck and happy sewing!
–Cassandra

P.S. For more quilty fun,  please check out our pinwheel block tutorial and scrappy log cabin block tutorial.

Cocktail Hour

 When its hot outside, there's nothing better than a cool, refreshing summer drink. And using fresh summer flavors make any cocktail (alcoholic or non-) even more special. A peek at the (very hip) craft-cocktail movement reveals the use of completely unexpected flavors in today's drinks - often to extremely refreshing effect. Specifically, the use of uniquely flavored bitters, herbs, vegetables, and even tinctures and oils have introduced entirely new flavor profiles to imbibing.

This past weekend, I was invited to Sunday lunch at a friend's home and was tasked with bringing along some type of mixer for our cocktails. The host suggested making a "mojito" of sorts with basil, mint and cucumber. I decided to take it a step further and create some syrups that could be mixed with seltzer to make both a refreshing fizzy drink or a mixer for gin or vodka.

In the end, I made two syrups - my host's suggested combination as well as a strawberry rhubarb (because I had leftover strawberries that were over-ripe and a MOUNTAIN of rhubarb in the backyard). For a first go-'round, I think they came out really well. The kids particularly enjoyed the "strawberry soda" and the adults tried both concoctions with either gin or vodka. My favorite was gin mixed with the cucumber syrup.

Today, I'm going to share the recipes for the two syrups with the caveat that I'm still experimenting and I reserve the right to update the recipes at a future date. Since the basic construction is the same, you can do this with nearly any fruit/vegetable/herb/etc. If you start experimenting and come up with anything particularly awesome, please share in our comments section. Thanks!!

Please remember to drink adult beverages responsibly!

- Alex

Strawberry-Rhubarb Syrup

2 C water
1.5 C sugar (you can use up to 2 C sugar but that's too sweet for me)
Juice from one lemon
1 C strawberries (cut up)
2 C rhubarb (chopped)

Combine all ingredients in a pan. Bring to a boil, stirring often to dissolve the sugar. Then lower heat to a simmer and cook for approximately 30 minutes, uncovered. Once the strawberries start losing their color, use a potato masher to mash the strawberries and rhubarb in the syrup. Turn off heat and let the pan sit and cool for a little bit. Then, through a fine mesh strainer, strain the mixture into a Mason jar or similar, glass container. Use the back of a spoon to push the liquid through the strainer.

I reserved the strawberry/rhubarb mush to put on ice cream.

Let the syrup cool completely then mix with seltzer for a fizzy strawberry/rhubarb soda. If you're over the legal drinking age, try it with vodka, gin, or white rum!


Cucumber Basil Mint Syrup

2 C water
1.5 C sugar or less (this particular syrup was WAY too sweet with 1.75 C of sugar which is why I'm still experimenting...)
2 large cucumbers (cut up) - approx 2 C
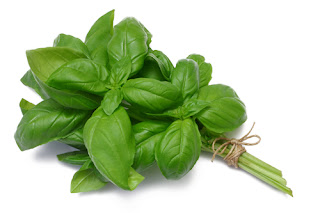
1 C basil leaves
1/2 C mint leaves

Combine all ingredients in a pan. Bring to a boil, stirring often to dissolve the sugar. Then lower heat to a simmer and cook for approximately 30 minutes, uncovered. Once the cucumbers are very soft, use a potato masher to mass the cucumbers and basil/mint leaves in the syrup. Turn off heat and let the pan sit and cool for a little bit. Then, through a fine mesh strainer, strain the mixture into a Mason jar or similar, glass container. Use the back of a spoon to push the liquid through the strainer.

Let the syrup cool completely then mix with seltzer for a fizzy, refreshing herb/cucumber soda. If you're over the legal drinking age, try it with vodka, gin, or white rum!

Friday Finds: Ehrman Tapestry

I totally don't know how to needlepoint, but the people over at Ehrman Tapestry make me want to start. Their designs are stunning! I actually stumbled upon them in an ad in my Smithsonian magazine of all places. Pillows, wall hangings, chair seat cushions, rugs, etc.

They have classic designs like this:

Tashkent

Land and Sea

Designs inspired by classic art:

"Rust", design inspired by Gustav Klimt

And even limited editions from modern-day design rock stars:

French Cityscape by Kaffe Fassett. Watch out, this one is spendy!!
I think I have to order one, I really think I do!

–Cassandra

Travelogue

As Alex shared with you last week, I had a cabin adventure in up north Wisconsin. Aside from the oppressive heat we are enduring in our state these days, the trip was wonderful. My littles got to experience boating, beach fun, campfires, rural attractions, and special time with family. A couple snapshots of the inspiring up north atmosphere...

Paddleboating
Amazing historic steam train
But my own personal vacation, the one where I make something or escape into a book. Always snuck in during the down times. Some of it at the cabin and some of it in my few days home before starting back to work at Company X. Well, it looks more like this...

Fox is coming to life
Super-secret knitting
Crocus sweater in progress
6x10 quilt blocks...tutorial to come
Really enjoying this book (and iced tea)
Some projects were touched more than others. An there is always the regrets of projects left undone (ie. the hand lotion bars I was hoping to make). If only vacation time could just move a little slower than regular time.

–Cassandra

Garden Dinner

Over the weekend, the record-high temperatures finally broke and Wisconsin returned to relatively normal weather for July - with the obvious exception of still having no rain. To give you some sense of how bad the drought has been, the average rainfall in Wisconsin in the month of June is 4.5". This year, the month of June brought us 0.3" of rain. My water bill is going to be astronomical.

Okay...maybe it's not THIS bad but...

I don't usually water the grass because, to my mind, the water is better spent keeping my vegetables and flowers alive. However, last week I heard that, if the grass didn't get some water in the next week or so, it wouldn't bounce back this year. So, I broke down and watered it a couple of times. You know what bounced back? The freakin' weeds.

Regardless, I've managed to keep my garden alive - albeit a bit distressed. The leaves on the tomato plants are kind of curled up, but the plants are making fruit. The cucumbers are still hanging in there, as are the zucchini and eggplant. The arugula suffered a bit from the heat and constant watering and kept trying to bolt to seed. And, sadly, I think I've lost my peas. They're really dry and all the flowers have gone brown. Which brings me to the point of today's post.... eating from your garden.

Even though the peas may not come back, I was able to get one meal's worth of peas from the plant - and boy were they good. In fact, last night the bulk of my dinner came from my garden! It was satisfying to walk outside, cut what I needed and then cook it. This was the menu:

Tilapia served with two types of pesto
Green bean, yellow beans, and peas
Sauteed chard with white beans

The basil and arugula for the sauces were from the garden, as were all the vegetables save for the white beans. A few of the cooking ingredients, like garlic scapes, garlic, and onion, came from my CSA (community supported agriculture) box so everything was organic and super-fresh. It really was a treat.

So, for today, I thought I'd share a few of the recipes from last night's dinner. I hope you enjoy them!

- Alex

Arugula and Garlic Scape Pesto

Arugula is my favorite leafy green
  • Rinse about two cups of tightly-packed arugula leaves, removing any very thick stems.
  • Dice approximately 1/4 cup of garlic scapes, discarding the flower.
  • Place arugula, scapes, 2 tablespoons of pine nuts, 1/4 cup of parmesan cheese, and 1/8 cup of olive oil in a blender. Blend until smooth, adding more oil as necessary to get a good consistency.
  • Adjust the seasonings, adding more cheese, pine nuts, and salt to taste.

A word of warning - arugula can be VERY peppery and this sauce will pack a serious kick. More cheese helps tone this down a bit but don't let the cheese overpower the arugula and scapes.

Garlic scapes! Yum.

Traditional Basil Pesto

  • Rinse about two cups of tightly-packed sweet basil leaves, removing any very thick stems.
  • Dice one or two cloves of garlic - enough to provide you with approximately one tablespoon of garlic or more, depending on how much you like garlic.
  • Place basil, garlic, 2 tablespoons of pine nuts, 1/4 cup of parmesan cheese, and 1/8 cup of olive oil in a blender. Blend until smooth, adding more oil as necessary to get a good consistency.
  • Adjust the seasonings, adding more cheese, pine nuts, and salt to taste.
Traditional pesto is amazing on meats, pasta, and even as a sandwich spread. One of my favorite things to make is a "Caprese" sandwich. Slather some bread (preferably something with a good crunchy crust) with pesto. Top with sliced tomatoes and mozzerella cheese. This sandwich is great cold or grilled.

Sauteed Chard with White Beans


1 large bunch of chard (Swiss, rainbow, or a variety)
1 clove of garlic, sliced thin
1/4 cup diced (or thinly sliced) onion
A pinch of crushed red pepper
2 Tablespoons olive oil
2 or 3 Tablespoons of water
One can of cannellini beans (I prefer the Progresso brand)


  • Rinse the chard, removing the toughest part of the stalks. Coarse chop
  • Heat a deep saucepan on medium heat, add olive oil and onion - cooking until onion is translucent.
  • Add garlic and crushed pepper and cook approximately one minute.
  • Add the chard and stir well to coat with the oil and seasonings. Cover and lower the heat to medium-low. Cook for about five minutes then add a little water to keep the chard from sticking to the bottom of the pan and stir. Cover again and continue to cook until the chard is cooked through.
  • Add cannellini beans, stir well, and heat through.

Best of Cassandra: Every Stitch Is Knit With Love

Cassandra is on vacation this week with her children and some extended family. You all may remember her camping escapades from last summer, the result of which was the rental of a CABIN in the woods this summer. No more tent camping for this family.

So, today's post is a "Best of..." post - a little blast from Cassandra's blogging past, brought to you courtesy of the fact that I'm currently knitting mohair lace. This is Cassandra's story on that front. I hope you enjoy.


Every Stitch is Knit with Love

Now I'm going to just say it like it is, I'm not a hugger. Aside from my husband and children (or situations where others need a hug because they're crying or something) I'm not inclined to dole out too much affection. Those who are close to me know this. Most friends choose to hug me anyway... I think they love weirding me out. As a rule, you know I love you when:

1. we laugh together really loud, really often
2. you are the recipient of my hand-made items

As much as I grouse about crafting for others, I do it with love. Something compels me to make things for the little ones in my life, as well as big people who will appreciate the work that goes into the project. I'm not a hugger, I'm a doer.

I think I learned this behavior from my maternal grandmother. I grew up in the same house as her, and she is a very handy lady. She can cook, knit, and sew circles around me... and she is 85. My growing-up years were spent watching her make things for bake sales (seemed like weekly), taking her turn doing the washing and mending of the alter cloths and robes for the church, knitting for every new baby, and more. She's not a hugger either, she's a doer. Last winter I decided to make something just for her.


 I had a small amount of mustard-yellow fine mohair yarn in my stash for a while. Yellow is my grandma's favorite color so I decided to try my hand at lace knitting and make her a neck scarf. I was knitting along just fine for about 5 inches....until....scratch, scratch....teary-eyes....I can't see. I discovered that mohair and I didn't get along very well. My eyes were really swollen and red and kind of scaley. I felt like a cat with a hairball stuck in her throat. It was very unattractive.

However, I did what every good knitter would do, I went into denial and kept knitting. Certainly, it wasn't the mohair. It couldn't be! Must be my hand lotion, or the chlorine from the swimming pool, or my shampoo! There were visits to 2 different doctors and various remedies (including changing my hand lotion and shampoo) - and, yet, I still kept knitting. Eventually, I had to admit that it was the yarn but I was making this for my grandma and, dang it, it was going to get done!


After weeks of itchy eyes, I finished the lace scarf. It was lovely. I packaged it up to mail to grandma, took my knitting bag to the cleaners for a good de-mohairing, and vacuumed everything. It took a few months for my symptoms to go away, but they eventually did. I had truly suffered for my art, and for my grandma.

Alex modeling the scarf for me before it hit the mailbox.


Alex's post from Monday is the inspiration for telling this story. It made me reflect on my relationships with the people that I care about. Do they know that I care? I know how stingy I am with affection. Then I thought about the yellow scarf. I thought about how important it was to me to finish it and give it to my grandma, even if my eyes itched. I was making it for her because it reminded me of her. I thought about her every time I picked the project up. I know it's lame, but, I think that is when you can say "there is love in every stitch".

So what, I'm not a hugger. But, I just might knit you a sweater...

–Cassandra