Showing posts with label tomatoes. Show all posts

Dirty Hands

Saturday, May 25 2013 was a cold, cold day in Madison. But I'd set my mind to buying plants and putting them in the garden. I simply couldn't wait any longer.

So... there I am, at 7:45 a.m., trudging around the farmer's market, freezing and loading up on tender little bundles of future food. A small fortune later and I had cucumbers, tomatoes, arugula, basil, thyme, parsley, rosemary, eggplant, ground cherries, spinach, lettuce, and swiss chard. Oh... and a huge bunch of jonquil bulbs that the woman sold me for a dollar. Of course, once I got home, I felt compelled to get everything into the dirt.


Eggplant and ground cherries in pots. Note how good my willows look!
Arugula, finally not wilting.


Tomatoes, looking good.

The cold was pretty brutal and my new plants didn't take to it very well. They stayed sort of wilty and sad looking for a couple of days. But this morning, with the onset of warmer weather, everyone has perked up. I've already lost one cucumber (it just never took) and two basil plants. I think the basil got chewed or stepped on by the baby rabbit that lives in my neighbor's yard.

My new favorite basil - Pistou. It's a tiny-leaved, globe that's great in pots.

This is the second year that I'm trying to grow greens in a pot. Last year's attempt was mixed. The chard did fairly well (except for getting some pest called a "leaf borer") but my lettuce never really took off. I think I crowded the plants so, this year, I'm going to seriously thin them out after they've established a bit. Fingers crossed.


The other addition to my garden on Saturday was a "As Seen On TV" Pocket Hose. Yes... I couldn't resist. I've been eying on the late-night infomercials for a while and then, the other day, I walked in to Walgreens and there it was - in all its glory.


AWESOME!

You may have previously read of my love of all things "As Seen On TV". I make no secret of my obsession. And, once again, the product has lived up to the hype. I'll never own a regular garden hose again. :)  Plus, I get the added bonus of being able to say inappropriate things to visiting friends like, "Would you like to see my hose grow?" (Yes... I'm really a 12-year-old boy trapped in this grown-up woman's body).

Best products, ever.


Here it is at 50' long. Seriously - it reaches my entire back yard.
 The gardening has started in earnest. I guess summer really is planning to arrive this year.

- Alex

"Look! I'm a Farmer!"

On a glorious, sunny day a couple weekends ago, Alex and I took my boys tomato picking at a local organic farm. At one point, as my older son dragged his tomato-heavy sack along the path, he exclaimed, "Look! I'm a farmer!". And, if fact, we did all feel a little closer to the earth that day. We had a blast. See for yourself...

Vermont Valley Farm

Purple Basil

They had lime and lemon basil too! All we could pick for free.

Here come some pickers.

Folks making pesto right on the farm.

Carrying heavy bags of tomatoes wears boys out.

All heritage varieties.

The aisles.

I am being shown how the slope of the tomato is the same as the hills around us.

Alex showing us how to pick a ripe tomatillo.

Tomatillos!

Alex showing my big boy how to find the good ones.

Stunning views.

Little bear loved the goats.

My booty waiting to be canned.

If you have the chance, get to a local farm that has pick-your-own days. There is something extremely satisfying about picking large amounts of something to put up for the winter while chatting with your loved-ones and like-minded strangers. 

–Cassandra

If I Can, You Can Can.

Nary a week goes by when I'm not distracted by yet another challenge. And, in case you haven't noticed, in the summer months my particular bent is toward food - growing, harvesting, cooking, storing, eating. You get the picture.

So, in keeping with summer tradition, I tried something brand new (to me): canning.

Interestingly, when I mentioned to one of my social media acquaintances that I was going to try canning, the response I got was, "I'm not crazy about food kept in cans." Which made me laugh because I'm just homey enough to have an innate knowledge that "canning" means "putting stuff up in Mason jars" - even though I didn't have a clue what the process actually entailed.

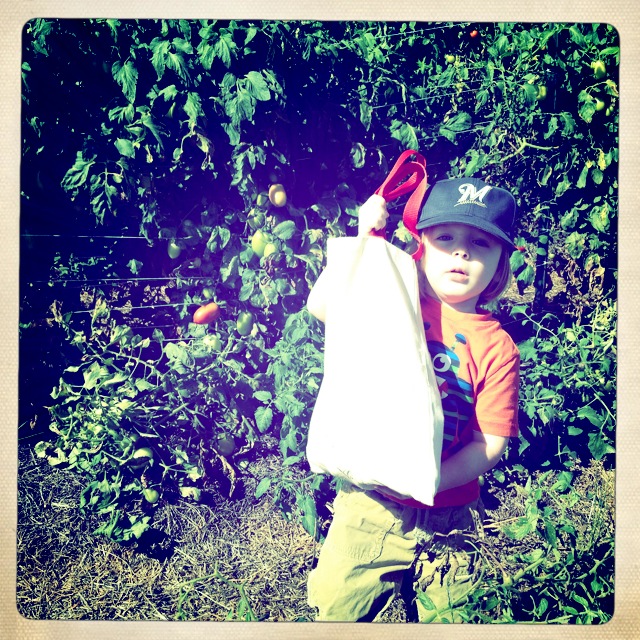
What prompted this Little House on the Prairie activity was not Cassandra (heh, heh) but was a trip to my CSA (Community Supported Agriculture) farm for one of the annual U-Pick Tomato events. As part of my share, I got to pick 10 lbs of tomatoes for free and as many additional pounds as I could carry for $1.50 a pound. So, yeah... I came home with 25 lbs of tomatoes along with basil, garlic, and a bunch of tomatillos (which I don't know what to do with). Fortunately, I split the tomatoes with someone. :)

Not really sure what to do with tomatillos other than salsa verde...

Even after splitting I was left with nearly 15 lbs of roma and heritage sauce tomatoes to process. Here's how it went down:

That's a lot of tomatoes!

First, I borrowed my friend's canning equipment (except for the Mason jars, which I always keep around the house). This is a critical step because, if it had turned out that I hated canning, at least I wouldn't have purchased the equipment.

Suzanne's giant canning pot dwarfing my soup pot.


Next, I looked up a good, step-by-step video instruction on YouTube. I ended up following the efficient and no-nonsense Ball Canning's video called, simply, "Canning Tomatoes With Ball Canning". It's like they made the video just for me!


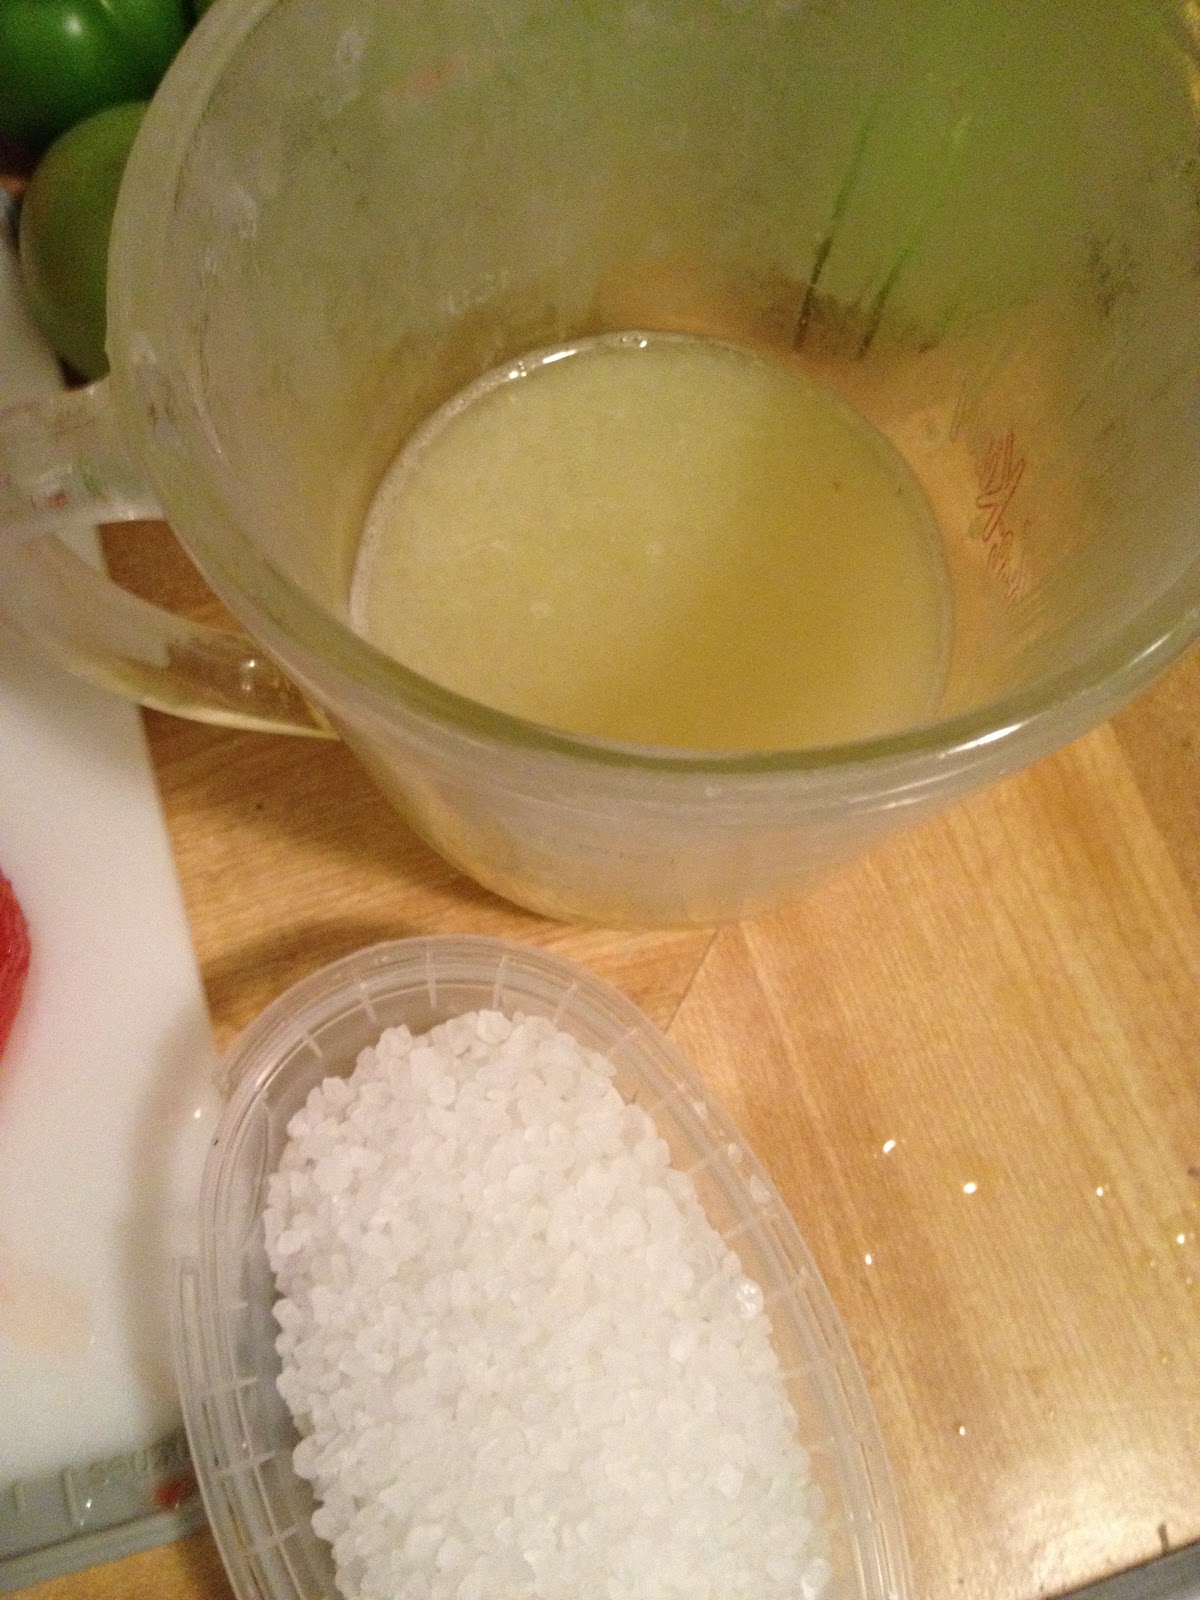
The most crucial step was setting up the various tools needed to do the process. It's sort of an assembly-line thing so it's good to have everything lined up and ready to go. Also, because the canning pot is SO HUGE, you really have to start the water well in advance in order to bring it up to boil. So, I had a small pot of hot water (not boiling) to soak the jar lids in, a soup pot of slow boiling water to immerse the tomatoes in and a bowl of ice water to immediately stop any cooking of said, immersed tomatoes, a cutting board and knife, warmed up Mason (Ball/Kerr) jars and bands, lemon juice, "canning" salt (I just used kosher salt), and, of course, last but by no means least, the giant pot of boiling canning water.

And then we begin:

#1: drop tomatoes into simmering water for 30 seconds
#2: plunge hot tomatoes into ice bath to stop any cooking & break the skin


#3: peel the tomatoes (skin should slide off) and prepare to cut
At this point, you can cut the tomatoes into whatever shape you want to store. I used TONS of diced tomatoes so I did most of mind that way. However, I also put up a few that were just quartered and one 1/2 pint of whole tomatoes (two small, whole tomatoes actually) just for fun.

Put some lemon juice (about 1 tablespoon per quart jar) and some salt into each jar. I only used a pinch of salt based on the size of the jar - a bigger pinch for a quart, a smaller pinch for a pint. I don't like to add too much sodium to anything.


Once the jars are packed, ladle some of the boiling "tomato immersion" water into the jars until there's only a half inch of space to the top of the jar. Then, slide the handle of your ladle or a spatula down inside the jar along the glass. Push the tool in toward the center of the contents to release any trapped air in the jar - working your way around the jar a few times. It's important to note that you can also simply "tap" the bottom of the jar on the counter to remove air but you run the risk of splashing the boiling water and/or cracking your jar(s).

Finally, take a lid from the hot water bath (you forgot about these, didn't you?) and place on the filled jar. Finger-tighten a band on the jar to hold the lid in place. Now, place your jars into the immersion rack.

Ready to take a bath!

In the canning pot
Make sure there are about two inches of water above the tallest jar in your pot. Bring back up to a slow, steady boil with the lid on and "cook" for the correct time for your jar size. In my case, because I did three different jar sizes, I had to remove the half-pints at 30 minutes, the pints at 40 minutes, and the quarts at 45 minutes.

Once the time is up, carefully (I cannot stress this enough) take the boiling-hot jar out of the water and place on a towel in a place where the jar can remain undisturbed for at least 12 hours. There's actually a tool for removing the jars from the water. I would highly recommend buying one of these. Once the jars are cooled for 12-24 hours, the lid should be tight and unable to be removed by hand when the band is taken off. Also, the lid should be, sort of, indented and not be able to be "popped" when you push on it.


My first cans!

I actually used some of my diced tomatoes in a crock-pot ribs recipe the other night - so they only stayed in the jar for a few days before they got eaten. What I can't understand is why they don't cook to mush with all the boiling water, but they don't. They were awesome.

The process was surprisingly easy. It's just a little time consuming (mostly the cutting the tomatoes part) and a little messy. Were I to do it over, I certainly wouldn't pick 8pm on a weeknight to start. LOL But, overall, it was a fun process and one that I'm sure I'll do again. And, you know what? If I can can, you can too!

- Alex

How My Garden Grows

Friends of Mighty Distractible know that I love to dig in the dirt. I've posted about my garden and/or my desire to be gardening many, many times - and this year was no different. I was lusting over seed catalogs and dreaming of putting plants in the ground before the ground was even defrosted.

The early spring and subsequent great weather has made this year a gardener's dream. My plants got in early (although still later than my more industrious neighbors) and many things are already starting to flower or fruit.

Happy Buddha = Happy Garden

When one lives in a relatively urban setting, one looks for any nook or cranny to plant in. I'm forever impressed by people who live in real cities, like NY or Chicago, and find empty lots or rooftops to cultivate. I'm lucky in that I have a pretty decent sized lot which allows me a yard for my dogs and spots to plant fruit, veg, and flowers.

My standard plantings include tomatoes, cucumbers, herbs, basil (which gets its own plot), and arugula. One corner of my little plot only gets afternoon sun and I've tried for years to find the right plants to grow there. A few years ago I stumbled on the cucumber/arugula combo which seems to work fairly well. Once the cukes get high enough on the fence, they get more sun and they thrive very well. The arugula is always a bit puny but there's enough for a few meals anyway.

Any strip of ground is fair game

This basil will end up 2.5 feet tall and overflow this space

This "weed" along the edge of the basil is edible purslane

It looks a mess but this is my herb garden.

I was lucky enough to inherit two gorgeous plants when I bought the house - a prehistoric rhubarb and a likewise blackberry. Both of these plants are HUGE and prolific, keeping me in fruit for months.

I'm also lucky in that my thyme, oregano, and chives (of course) keep coming back each year so I haven't had to replant them in a while. My parsley was also perennial until this year when it inexplicably died. So, a new flat-leaf parsley went in this spring. I also decided to plant a raspberry to go along with the blackberries.

Then, for some reason, I went a little nutty. Maybe it's because, for the first time, I cultivated some items from seed. I grew things I'd never grown before - without thinking about where they might actually get planted. These actions led to this:

Greens, greens, and more greens

Eggplant, chard, & zucchini
Beans and peas
There are plants EVERYWHERE. Every container that I had laying about in the garage or the shed now has plants in them. And, when I ran out of containers, I went and bought more.

So, now I've got eggplant, zucchini, swiss chard, rainbow chard, two types of lettuce, spinach, two more varieties of basil (besides my normal plot), bay leaf, two more containers of arugula (because I want more than just a couple of meals out of it), green beans, yellow beans, and sweet peas. WHEW!

My first-ever green beans!

On top of this, I have my flower beds. Most are on autopilot now, having planted lots of perennials, but I did end up with a volunteer lupine that needed attention and I put in a few new flowers to fill in some gaps.

Clematis in the foreground and my lily & iris bed in the back

I had to do something to distract from the back of the garage!

Overall, I'm pretty happy with the garden this year. I'm excited to see how much yield I get from my vegetables and how well all these things are going to grow in pots.

I'd love to hear about our readers' gardening exploits. Do any of you have favorite plants you put in every year or a "best practice" you'd like to share? Let us know!

- Farmer Alex