It's Not Even My Hobby!


Weekend before last, Madison hosted the annual Quilt Expo, sponsored by Wisconsin Public Television and Nancy Zieman of Sewing With Nancy fame. This four-day extravaganza of all things quilting was something I'd always been fascinated by but never attended because, you know, it's not my hobby. However, as you all know, it HAS become Cassandra's hobby this year (The Year of the Quilt, remember?) and, being the lovely, supportive friend I am, I agreed to go with her this year. This served double-duty as it meant that her husband didn't have to get dragged along for once. :) And, truth be told, I'm sure I'll end up making a quilt at some point. I just haven't gotten there yet.

And, speaking of husbands, I wish I'd gotten a photograph of the "wall of husbands" sitting in folding chairs, waiting for the wives to scour the aisles for fabulous quilt-y goodness.

Interestingly, the Quilt Expo helped pique my interest in this particular craft because, holy cow, these quilts were A-MAZ-ING. Plus, it helped me to define what I like in a quilt and what I don't - thus, getting me closer to actually picking a pattern and fabric. The one thing that both Cassandra and I agreed upon is that, regardless of whether a quilt was done in a style we liked or not, we could really appreciate the craftsmanship and work that went into each.

So, we played hooky from work on Thursday afternoon and basked in the glory of gorgeous quilts and amazing talent. One high point of the day was as we were leaving the Expo hall, I was looking at something and Cassandra suddenly said, "It's Nancy! You're Nancy!" and then we proceeded to go all fan-girl on Nancy Zieman and I think we scared her. She sort of smiled and backed away (in horror). So, herein you'll find our photo-essay of our day at the Quilt Expo 2012, minus a picture of us with Nancy.


The first thing we saw, above, was a bunch of women tailgating outside the entry to the Expo Center. Yep, if there's an event and a parking lot, a Wisconsinite will tailgate...

An understated entry for such an majestic event.


One of our favorites - Blue Underground Quilts - doing wonderful, graphic, modern designs.

Buttons, buttons, buttons

We were, honestly, at the young end of the demographic.

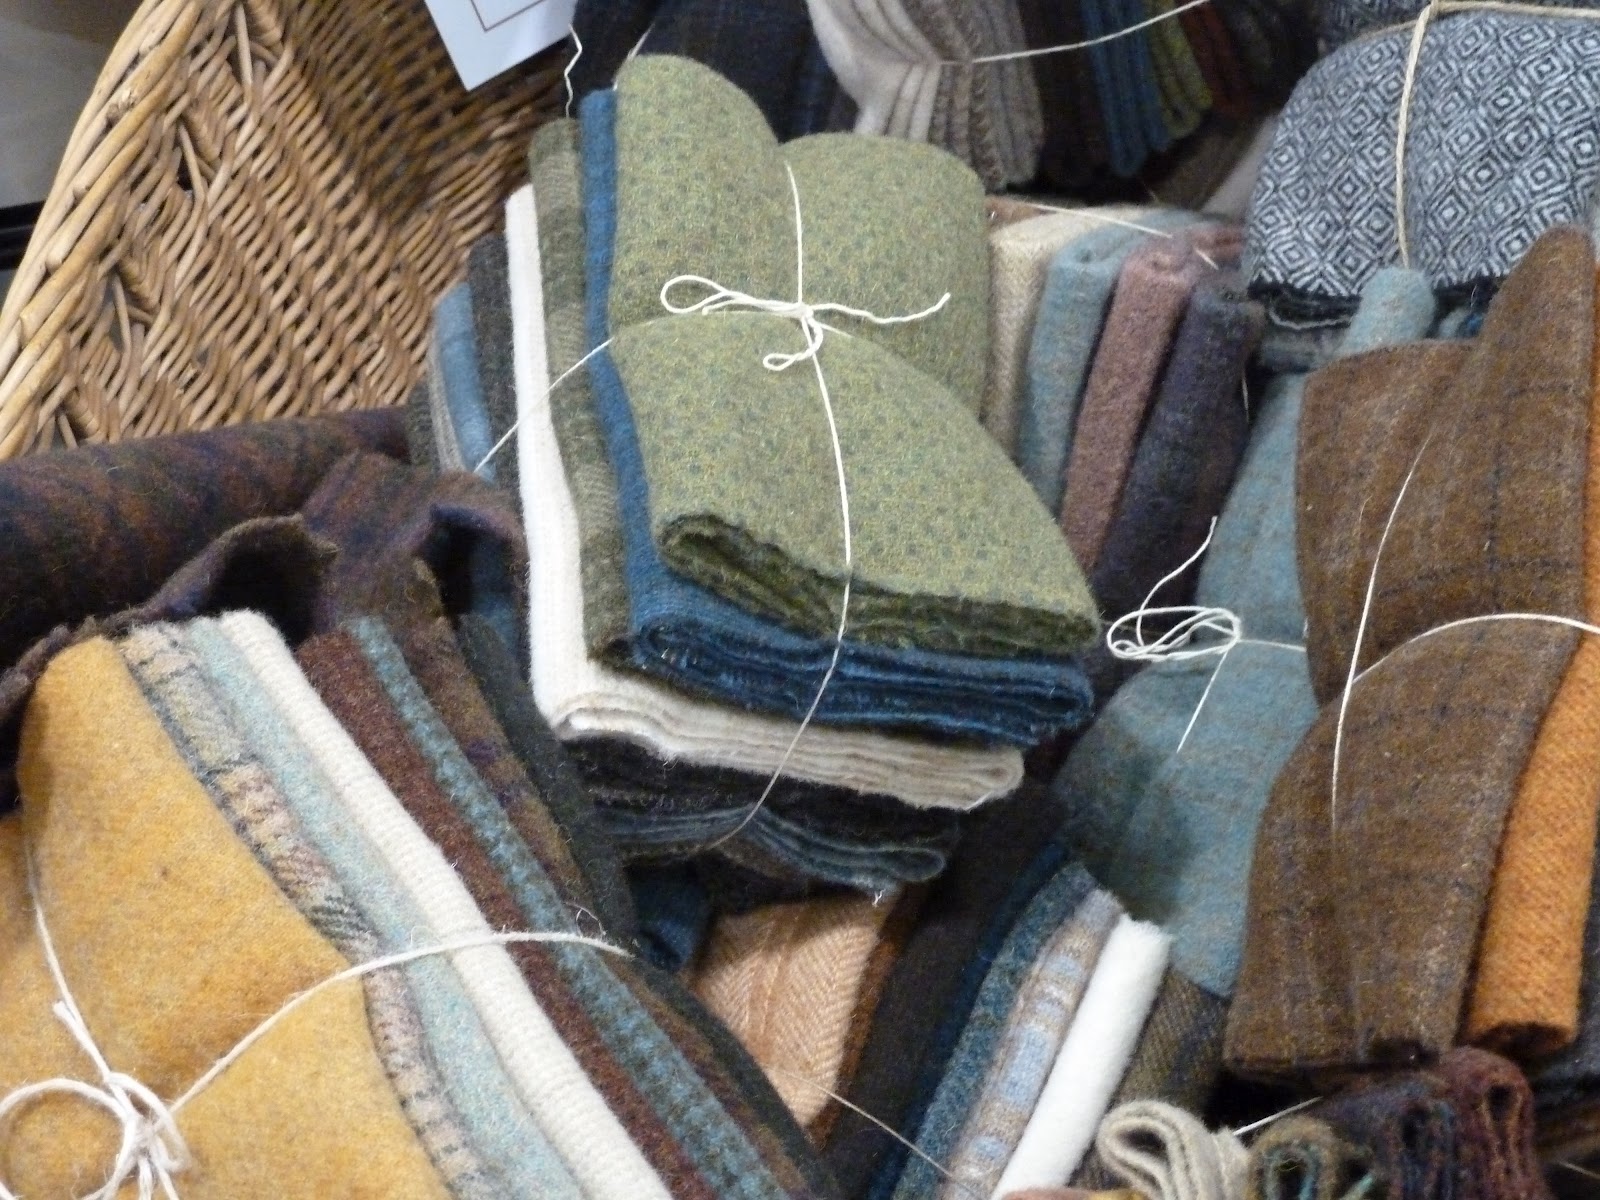
A basket of wool quarter-flats.


We really adored Cottage House Primitives wool quilt designs. Very different from most of what we saw at the event.

Well-crafted and great use of technique.

This woman was doing a latch-rug. Very cool process.


We fell in love with these quilters - Sew Mod. Their style sense, fabric choices, and modern variation of classic design was outstanding. It really set them apart.

Cassandra loves this "bug in a jar" fabric. Quilt from Sew Mod.

Outstanding use of color and fabric. Another favorite.

Also from Janie Lou (above). Note the contrasting, black quilting.


Modern Quilts Studio publishes books and patterns of their own design. This husband and wife team has some of the most original designs we saw.

More from Modern Quilts.

A beautiful example of a wall-quilt. The quilting was done on a long-arm.

More detail.

Note the bunny shape in the quilting itself.

We loved the composition and color of this winner.


This was our favorite quilt of all the entries into the competition. The amount of design work that went into this piece is astounding. If you expand the photo below, you can read a description of the quilter's inspiration. It's a lovely story.


Cassandra's haul of fabric which will be used to make a quilt for her daughter.

Friday Finds: Anthopologie's Fall Housewares


I love Anthropologie enough to marry it. Admittedly, I usually b-line over to the clothes section...but this fall's houseware line has captured my imagination. Could it be because it is a woodland animals inspired collection called "Wild Things"? (Ahem) Some of my fave's:

Love these lines...and if you look closely, the fabric is a really natural cotton.

Natural World dessert plates...love those bugs.

Rustic Romp Taper Holder. I can't live without this.

Flight Navigation Wallpaper...be still my heart.

Fox Forestry Hook. I know exactly where I want this.
Aqua Ombre Velvet Pillow. No one would be allowed to touch this but me!

Have a few moments? Hop over to Anthopologie and bask in the chic-ness of it all. :)

–Cassandra


Storytime

In keeping with the true nature of Mighty Distractible, I decided at the very last possible minute to write about something completely different - both different from what I'd planned (which you'll still get to read next week, probably) and different from anything we've written before.

Now and again, I (more so than Cassandra) need to talk about stuff that's not craft related. Today, I want to regale you with a story I wrote and presented, as a speech, at Toastmasters. Cassandra and I both joined Toastmasters a few years ago, mostly because Cassandra wanted to be less nervous speaking in front of people and she wanted me to go along for support. :) We fell in love with our club and honestly think it's the most awesome place to learn how to get up in front of a group and not make a total ass of yourself.

So, this story worked pretty well as a speech and I think it's a pretty good tale in written form as well. I'd be really interested in your comments so, please, feel free to critique and/or let me know if you'd rather I never write anything like this ever again. :)

What Dreams May Come

A lot of people don't remember their dreams. Some people actually manage to solve daily problems while they're sleeping. Me... I dream in Technicolor. I mean, my dreams are REALLY, REALLY vivid. And long. And complicated. They are epic – like the entire Star Wars saga, including the prequels. And Jar Jar Binks.

A long time ago, I stopped telling people about my dreams because folks like to try “interpret” them. The crazy, complicated nature of my dreams – often with some exceedingly weird elements – generally causes people to give me the “Oh… the poor dear needs therapy” look or they simply back away in horror. Truthfully, once you’ve revealed that, in last night’s dream, you ran a talent agency that employed only supernatural creatures – like vampires and zombies – and you were being audited by the IRS, you’re pretty much going change the way people view you.

My first vivid dream happened when I was six years old. And, it was SO vivid, that I can recall the entire thing, still, today - decades upon decades later.

Here's the story of the dream that launched a thousand nightmares:

When I was in first grade, I was expected to walk to school by myself. Obviously, it was a more innocent time and I grew up in a VERY small town. So, each morning I would walk the half mile to the elementary school alone – from Maple Street, where our house was located, up to Main Street, along the stone wall that separated the sidewalk from the woods, past the house where the squirrel bit my finger one day (that’s another story) and on to School Street (the city fathers weren't very creative when it came to street naming). Then it was just two blocks to the front door of the building.

One day, as I was coming up to the school, I saw a huge group of people gathered around the front of a parked school bus. Truthfully, it was probably, like, four people but my memory tells me it was a crowd. The bus had hit a dog and everyone was standing around trying to decide what to do about it. I’d never seen a mammal injured like that and it was a very moving experience – as you’ll soon see.

That night I went to bed as usual. I don’t even think I mentioned the “dead” dog to my parents. However, my subconscious decided that it wanted to mess around with that idea some more. So, as I drifted off to sleep...

I was walking to school and came upon a huge crowd gathered around the front of the bus. The bus driver had hit a man. No one knew who he was but he was badly hurt and kind of mangled. An ambulance came and I watched as they loaded the body onto the gurney and into the back of the truck. Cut to the next scene (yeah…my dreams are edited like movies or tv shows… I have no explanation for that) and we’re in class. The teacher is explaining death to us and then the bell rings that it’s time for recess. My friends and I are on the merry-go-round when the ambulance pulls around to the playground and the driver says to us, “Hey kids! Want to see a dead body?” I was apprehensive but didn’t want to be left out so I said yes. BIGGEST MISTAKE OF MY SHORT LIFE!

The ambulance driver opened the back of the ambulance and my friends and I crowded forward to look. Suddenly – and you know where this is going, right? – the dead body jumped up and out of the ambulance and started chasing us around. For some reason, it honed in on me and turned in my direction. I raced into the school and tried to hide there but it didn’t take long before the dead body (I didn’t know the word “zombie” at that point in my life) was lumbering around the hallways looking for me. So I snuck out and ran, full speed, all the way home – down School Street, along the stone wall on Main Street to Maple Street and eventually, my front door – which, for some reason, was not my real front door but the front door of a much grander house. The house had huge, white double doors that opened to a front hall with a white marble floor. There was a winding stairway to the second floor with a pure white railing curving up along white walls.

I ran into the front hall and my father met me. He asked what was wrong and, as I breathlessly tried to explain that I was being chased by a dead body, the body burst through the front door and started toward me.

Then, just as I was convinced that I was about to be grabbed and, I suppose, killed by the dead body, Robin Hood appeared at the top of the stairs. His green velvet outfit stood out against the stark white of the stairway and front hall. He called out, “STOP!” and grabbed an arrow from his quiver. He took aim at the confused attacker and promptly shot the dead body dead.

And then I woke up and went and crawled in bed with my parents because I wasn’t completely convinced that Robin Hood’s arrow had really killed my overactive imagination.

Thus began my life of vivid dreams. There have been times when I've awakened screaming from bloody nightmares and times when I've been exhilarated by some superpower like flying or super-strength. Most of the time, I'm slogging through my nights the same way I'm slogging through my day - but with some "no physical laws" twist to the story. Last night I was, seriously, running errands in my dream - for hours - and I ended up shopping for groceries with a cart that could hold everything and was loaded nearly to the ceiling. Best of all, I got to remember every last detail.

- Alex

Propeller Quilt Block

Hi folks!

Today we have another tutorial for a classic quilt block design called the Propeller Quilt Block. This one uses techniques learned from the super-simple Pinwheel Quilt Block and adds a few more elements to make a very versatile 10" block.


What I love about this block is that the fabric color choices you make can alter the visual effect of this block radically. Check out these color options and see how these blocks make completely different patterns when repeated in groups of 4:


 And now, if you want to try this for yourself....

These are the pieces that come together to make this 10" block:


Let's begin by making 4 of these: 


Cut two 4-7/8" squares of each fabric color. Laying those two fabrics right sides together draw a diagonal line with a water soluable marker across one point to another. Then stitch a 1/4" seam on either side of the line as illustrated here:


Sometimes sewing on the bias (across the grain of the fabric) can be tricky on pieces like this. I have some tips on my Pinwheel Block tutorial that can help keep those seams neat. After stitching, cut apart along the marker line and press seam allowance toward darker fabric. Make sure your block is 4.5" square, nipping off the little "dog ears" where the fabrics come together.

Next, we will make 4 of these:


Begin by making strips of 2 fabrics 2-1/2" wide and at least 10-1/2" long. Sew those strips along the long edge with a 1/4" seam allowance. Press the seam open toward the darker fabric and place on your cutting mat. You will now have a big piece that measures 4-1/2" x 10-1/2".

Using your rotary cutter and straight edge, cut four, 2-1/2" wide strips off of the 2-color piece you just made.

Now, cut one 2-1/2" square out of the fabric from one of the diagonal pieces you made above for the center of the block.


All the pieces are now ready to be put together to create your block! So now what you need to do is lay your block out in just the way you want it to appear.


You are now ready to start sewing the sections together. Using a 1/4" seam allowance, stitch together each row on the top 3, middle 3, and bottom 3 sections of the block together like this:


Press all seams to the side. You have 3 pieces left. These all are now stitched together with a 1/4" seam allowance to finish the block.


Helpful tip: As I was sewing this block together, I found that pinning the blocks on the seams exactly where I wanted them to line up was critical for my seams to meet where they should.

This block is just one of many designs in a quilt I have in progress. But the more I look at the versatility of this design I get inspired to make a quilt entirely of these blocks. It could be scrappy and fun or super modern-chic!

–Cassandra

PS - See some of our other tutorials for more quilty fun: Staggered Strips Block, Scrappy Log Cabin Block, and Pinwheel Quilt Block.


Friday Finds: Easy-Peasy Ribs

At the beginning of every summer, I load the basement freezer with a bunch of meat for the grill. I tend toward steak and fish but will, occasionally, buy pork in various forms. I'm a huge fan of ribs and want to be the kind of grill-master (smoker-master?) that can turn out the kind of falling-off-the-bone baby-backs that you get at a good BBQ joint.


That's never actually happened.

A few weeks ago, I bought six pounds of ribs at the butcher. They were on sale and I couldn't help myself. I had visions of gorgeous pork ribs on the grill being brushed with some heavenly BBQ sauce - little bits of crispy fat on the edges. *drool*

Reality is an entirely different beast though. Turns out that the people I was going to cook for couldn't come over that particular weekend. I had to keep the ribs for a few more days and they would have to be cooked during the week. After work. Ugh.

So, my cooking plans had to change.

To my rescue, a friend suggested a crock-pot rib recipe that she had just recently found online from the blog "Our Family Eats". I was dubious for two reasons: (1) the ribs wouldn't have any charcoal-y goodness and (2) I have an unnatural fear of leaving my crock pot on all day when I'm at work. But I was in a bind so I gave it a shot.

The night before, I prepped the meat, chopped the veggies, and put the entire thing together in the crock pot. The pot then went into the refridgerator and, in the morning before I took my shower, I turned the crockpot on low with the intention of leaving it to cook all day until I got home from work. This was a giant leap of faith for me and I spent a lot of time that day worrying that my house was going to burn down.

At the end of the day (literally), what I ended up with was some amazing pork. They weren't the BBQ ribs of my dreams but they were cooked beautifully, had amazing flavor, and made for a number of fantastic meals. If I make them again, I might alter the recipe to make the cooking sauce more of a BBQ style but, for what it's worth, the original recipe is worth trying at least once.


Enjoy!

Beef Short Ribs
serves 4
3 pounds beef short ribs, trimmed of visible fat
salt and pepper
28 ounces diced tomatoes
8 ounces tomato sauce
1 medium onion, diced
[variation: I added some diced medium hot peppers - I used Hungarian Wax]
2 Tablespoons balsamic vinegar
3 garlic cloves, smashed and peeled [variation: I fine-chopped the garlic]
1 bay leaf
1/4 teaspoon dried thyme
1/4 teaspoon dried oregano
Preheat oven to 425 degrees.  Place short ribs on a roasting pan and sprinkle all sides with salt and pepper to taste.  Roast for 20 minutes.  Let cool and trim and additional visible fat from beef using a paring knife.  (You can do this part the day before you want to serve these and refrigerate overnight.)
Place short ribs in a crock pot.  Add all other ingredients.  Stir gently to combine. Cook on low heat for 10 hours (or 8 hours at minimum).  Remove bones from pot.  Serve beef and sauce over mashed potatoes or egg noodles.  Drizzle with additional balsamic vinegar if desired.

Art Smock

When my eyes met the words "art smock" on this year's school supply list for my little kindergartener,  I'm pretty sure I let out an audible squeal. You see, I've been itching to make the art smock pattern from Little Things to Sew by Liesl Gibson of Oliver & S for quite some time now.

Little boys don't take my photo shoots seriously.
This pattern is so darn cute and also super-practical. It does what it should, protects the clothes underneath. Some of my favorite features of this garment are: the elastic at the neck and the wrists keep your child's shirt tucked safely away from paint spatters and chalk smears, little front pockets to hold a crayon or two, and the length is great for catching spills that might fall on a little lap.

Another "action" shot!
I opted to do a velcro closure (a snap is also mentioned) so that my little guy can put the smock on himself and the teacher can easily help him fasten it closed without too much fuss.


The pattern was well written and logical. They have an advanced beginner rating on it and I think that is appropriate. One of the more interesting features of this pattern is that it employs french seaming. A french seam is a way of sewing your seam and finishing the raw edge on the wrong side at the same time. This project was a perfect application for that technique. I often forget about this method when sewing so it was a nice reminder.

All the fabric was purchased at Jo-Ann's on sale dirt cheap. This smock is going to be stained in no time so why spend a fortune right? I am so excited that my boy picked out the mushroom fabric all by himself from my stash. It gives me a warm fuzzy because it reminds me of my childhood in the 70's and now that aesthetic will be one of his memories too. I keep going back to the store and buying a yard here and there...inventing reasons why I need more. Alex thinks I should just give it up and buy a bolt!

Blurry images of a boy who can't stand still!
This was a great pattern, I highly recommend it. And there are some other really fun/practical patterns included in this book such as a bear puppet bath mitt, messenger bag and a cozy winter hood. If you have little ones in your life to sew for...check it out.

–Cassandra